Wednesday, July 5, 2017

DesignerStitch Remix Featuring Ella and Gypsy


Lately I have been all about changing patterns that I already have for a new look. It's not that I do not love the pattern created by the designer, it is more of a personal challange to expand on my growing talent. I was part of the test group for the Ella Cami and The Gypsy, both designed by Ann Grose at DesignerStitch. It was during the Ella test, blog post here, that inspiration hit and I decided to try my first attempt at combining two great patterns.


I had no clue where to start on this since I had never done this before. I measured the bodice of the Ella and the skirt of the Gypsy, and found that in my size 4 unaltered it was almost an exact match. There was very little modification if any. I did decide to keep the pockets from Gypsy skirt.


The directions for both patterns are super easy to follow, as all the DesignerStitch patterns are. I started sewing the bodice of Ella up to the point of adding the ruffle. Instead I cut and attached the Gypsy, using the high low front for the entire length.


My fabric is just a woven blend from Joann's Fall Apparel Collection. It was something I fell in love with at the start of the fall season, I just wasn't inspired to see anything with it until now. I joined in on the Monthly Stitch Indie Pattern Month 2017 and felt this was a great opportunity to use this beautiful fabric.


The Ella, which was recently released, and the Gypsy which was released the fall of last year both are available for purchase at the DesignerStitch shop. Both are available in multi-sized patterns, and are printed in layers to save ink. There is also have a great Facebook Support Group if you are looking for a little inspiration or even have a few questions.


Next week's challange is based on a new to me designer. I am torn between two designers that I have followed but never sewn anything from as if yet. Hopefully I decide soon or I may just end up with two entries.


Please note that this post contains affiliate links. If you choose to make a purchase, I will get paid a small portion of that purchase


Thursday, June 29, 2017

Ella Has Joined the Party

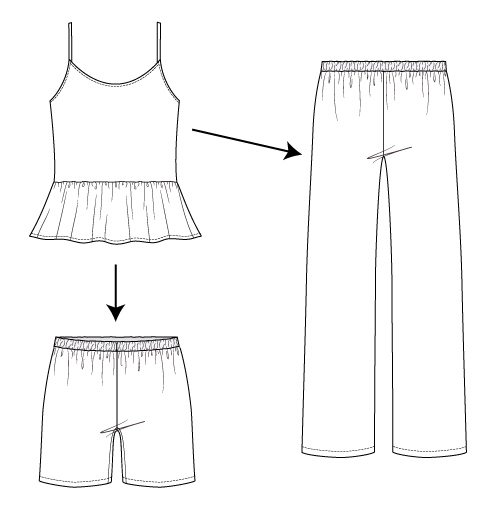
Hopefully by now you have seen the newest release by DesignerStitch, the Ella Cami, Shorties, and PJ Pants for Ann's month long anniversay celebration. If not you should check out the DesignerStitch Support Group in Facebook and find out how to get a copy for free.


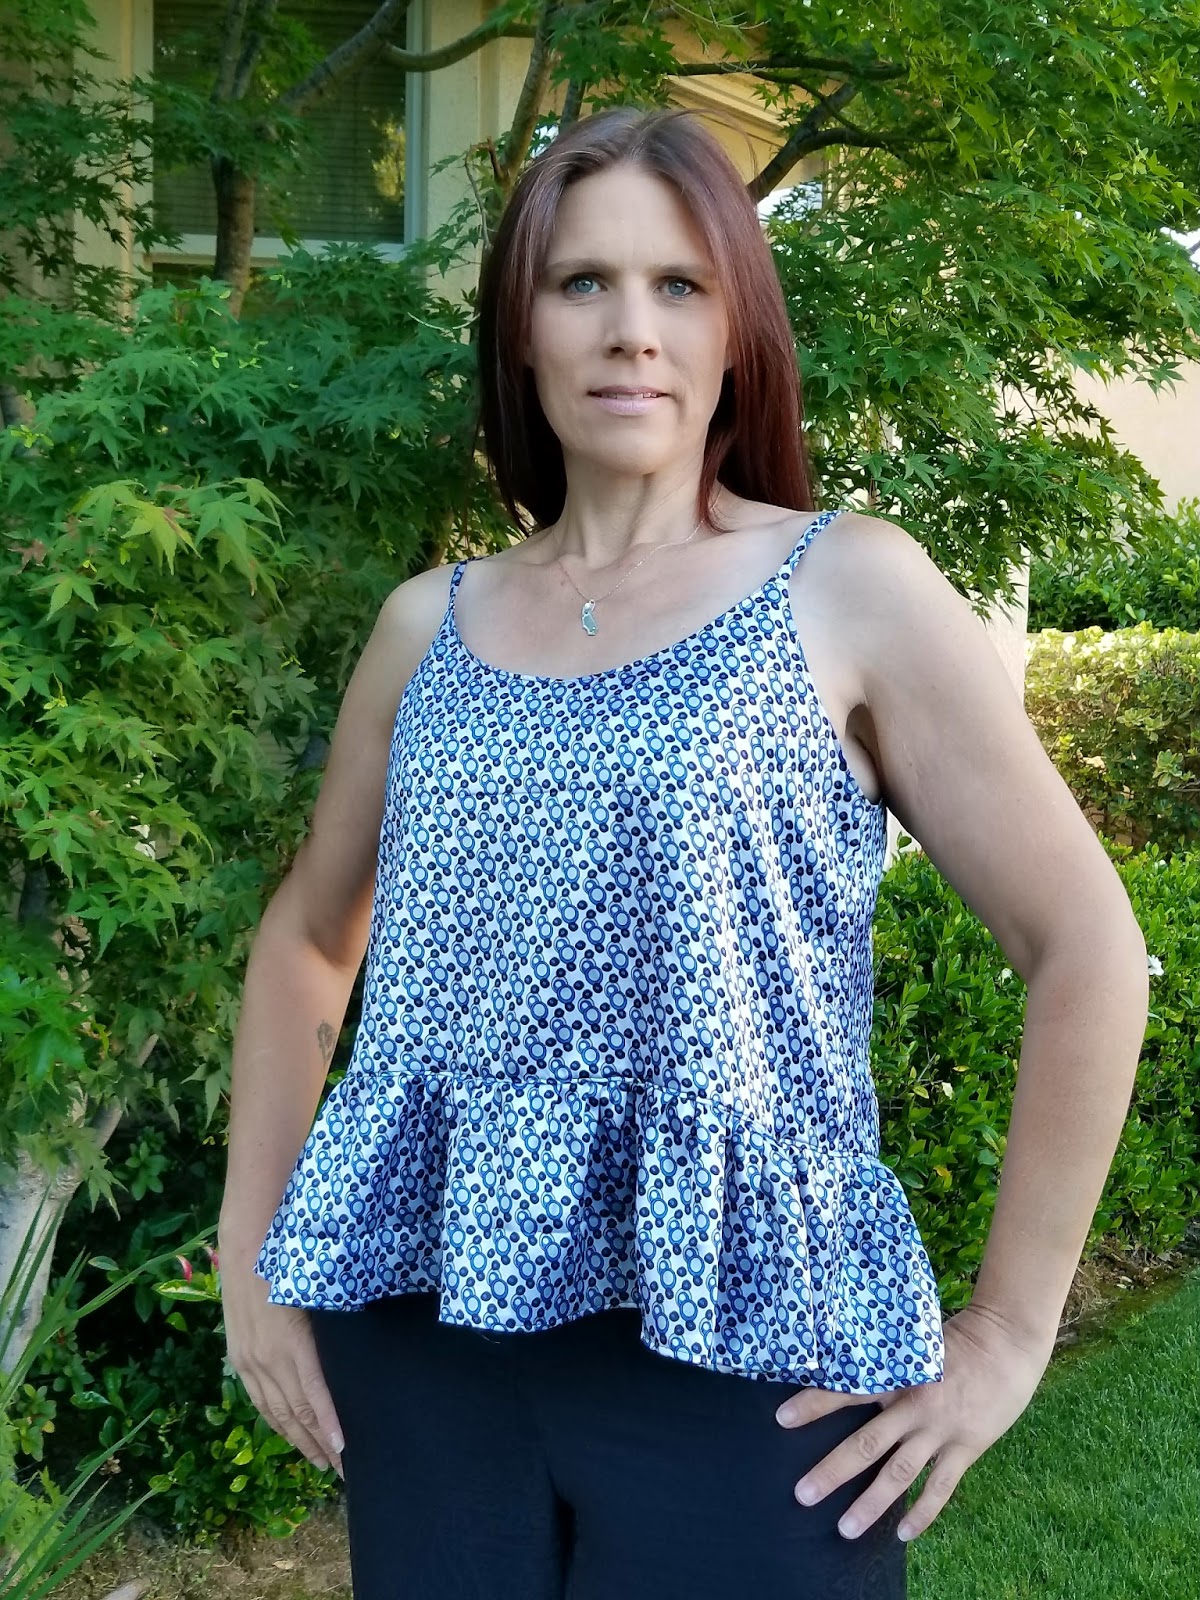
The call to test came during a week of 110F degree weather, so perfect timing for me. I do not have a ton of summer clothing I can wear, especially work appropriate tops. I was able to toss on a lightweight cardigan and wear Ella to the office, and when it came time to leave I simply removed the cardigan. The Cami could not have been more perfect for the boiling hot weather.


Ella was so easy to stitch together. Using a lightweight woven fabric you simply stitch the bodice, add the straps, ruffle, and facing. This top is perfect for a quick summer sew, definitely an hour max. 

The pattern is printed in layers and a chart tells you what pages you will need for each piece. Ann has written very clear instructions and great illustrations for easy assembly as found in all her patterns.


I made a size 4, no alterations, using a silky print I acquired from Joann's about 10 years ago. Since there is flexibility in the strap length, mine are about 10 inches. The pattern is a multisized pattern ranging from 2-22 U.S. and you will need elastixc for the waist. Ella can easily be made as a set or separates. I have found it is easily made into a dress, but thats for another day.


The name Ella reminds me of someone light and bubbly. Whether you are wearing Ella out on the town or home to sleep in, you cannot help but feel a little lively maybe enough to dance around in. Get your copy of Ella while it is free and take advantage of the current sale too. 

Please note that this post contains affiliate links. If you choose to make a purchase, I will get paid a small portion of that purchase


Saturday, June 24, 2017

Dress Up This Town Tour


I have never been a fan of dresses, until I started making my own. When I had the opportunity to join in on the Sewing by Ti Dress Up This Town Blog Tour, I had found the perfect opportunity to continue my summer theme of revisions to many of my existing patterns. Today I decided to combine the Patterns for Pirates Pencil Skirt (a freebie on their site), and Sweetheart.


I know in their Facebook group there had been a ton of chatter on combining the two for a rockabilly inspired dress. Originally, I was going to attempt it, but the Dress sat there for months because it just did not feel right. The fabric I was using screamed for something else, and I just wasn't listening.


When I joined this tour it was my intention to finish this dress. I tried it on, but still did not feel the rockabilly dress I was going to attempt. I wore it unfinished for hours just staring at it while on hoping to figure it out. Of course, just before bedtime it hit me. Why was I over thinking this? The simplest solution was the answer!


To get to the point where I was stuck for so long, I took the Pencil Skirt High Waist pattern and taped to it the bodice piece to the Sweetheart. I made sure to keep the waistline and hips where they should be. I was able to cut one piece for the front and back for a simple side seam only stitch up.


Once I figured out where I was going, I simply cut a black band using the 85% measurement at the top, and stitched it up like any other band finding the quarters, attaching,  and a top stitch. I can fold the band down or leave it as is for almost a rouched look.


After a simple hem, I was able to finally wear this dress that literally sat for months. Right away, I wore it to my job hosting karaoke. It stood up to constant movement, bending, and lifting. Not once did my strapless dress fall due to a wardrobe malfunction.

I love how this dress becomes work appropriate with the use of a cardigan, and a quick change into a night on the town.


If you have never tried any P4P patterns, you are missing out! They have over 57k followers on Facebook, a great website with tons of great information, and extremely easy to follow patterns. They were my first when I decided to try my hand at sewing my own clothing, and I always look forward to the great things they have available.

For checking out this week's tour, we have a special opportunity for you from some of our sponsors.

a Rafflecopter giveaway

Please note that this post contains affiliate links. If you choose to make a purchase, I will get paid a small portion of that purchase

Please be sure to check out the rest of the Dress Up This Town Blog Tour! I am certain you will find some excellent inspiration among the others posts as well!

Week 1: July 1st-8th
1- Sewing By Ti (Intro) ;Stitching At Night
2- Me Made
3- Tenille's Thread
4- Sewing By Ti
5- Seams Sew Lo
6- Anne Mari Sews
7- Sea of Estrogen
8- Lulu and Celeste

Week 2: July 9th-15th
9- Living in Twinado Valley***You are here. 😀
10- Ma Moose
11- My Heart Will Sew On
12- Seams Sew Lo
13- Kate Will Knit
14- Creative Counselor
15- Sewing With Sarah

Week 3: July 16th-22nd
16- Stitching and Making
17- That's Sew Lily
18- Sprouting Jube Jube
19- Auschick Sews
20- Anne Mari Sews
21- Lulu and Celeste
22- On Wednesdays We Sew

Week 4: July 23rd-31st
23- Stitching At Night
24- Sewing Curves
25- My Heart Will Sew On
26- Indulging Mum
27- That's Sew Lily
28- Adventures With Bubba and Bug
29- Capture, Craft Cook
30- Sewing By Ti
31- Sew Like a Sloth


Wednesday, May 17, 2017

The Amazing Amelia

I am always honored to test new patterns, and was thrilled when I was invited to join in testing Bella Sunshine Design's latest Amelia Maxi, Dress, and Top.


I consider myself still a beginner, a more advanced one, but I always seem to learn something new with each pattern I sew. I am very certain a confident beginner could be quite successful with this pattern. Regardless of skill, you will love Amelia.

Amelia is available in both Womens sizes 0-30, and Girls 6mo-12, so an opportunity for a Mommy and Me pattern. My daughter falls in between both, and I feared I wouldn't meet the deadline needing to alter the pattern to fit her, so I stuck with just the Women's size 8 short sleeve top and dress length, without a single deviation from the original pattern.

Both the Girl's and Women's version of Amelia include three lengths (top, dress, and maxi), and four sleeve options (sleeveless, short,  3/4, and long). The Women's already includes a Full Bust Adjustment option if you need it, I did not. The knit bodice in both versions can be paired with another knit or woven, I did both. I was a little concerned making the 8 because my hips measure 41 inches, but as you see there are no fit issues there.


The instructions were easy to follow and illustrations clear. I did get hung up my first time reading the band instructions, but when it came to construction it became easier to understand. Printing is also offered in layers, and there is a chart showing the pages needed to save paper.

I am so comfortable wearing either the top or dress. I even wore this to my job hosting karaoke and didn't have one wardrobe malfunction, but did get loads of compliments. I will be making one for my daughter, and a maxi for me as tge weather cools. I even have an idea on combining this with another BSD pattern, that post is coming soon.

Pick up your copy of the Amelia in Women's version on sale for $6.50, and the Girl's for $5.50, no code needed. This sales price is good through May 24th at Midnight EST.

Monday, May 8, 2017

My Angel's Love for Dublin


My daughter is not easy to shop for, it has nothing to do with her choice of style, but finding the right fit. Everything is too big or small, and I know I am not the only parent with this problem.

 Summer is coming and after a failed trip to the store, I decided to give New Horizons Designs Dublin Dolman a try. This pattern literally has endless options, so there was sure to be something that fit her and looked great doing it.


Available in the Dublin Dolman Pattern are both a tee and tunic length, which could easily be turned into a dress length too. The sleeves options are long, short, 3/4, and banded or not. The banded bottom can be tall or not, and neck binding or band as well. There is a gathered front and back option as well. The sizing starts at 6-12 months all the way up to 16, with a bonus 18" doll size. Even better is the option of purchasing the bundle at a discounted price and make a Mommie and Me top. They advertise this top as the last dolman pattern you will need, and they are 100% correct.


In sewing these tops I decided on the gathered for one, and banded tunic length for the other. I made this with a size 14 bodice and graded out to a 16. As for fabric, I used a poly knit for both following the suggested fabrics which include cotton interlock, cotton poly blend, cotton lycra blend, french terry, or any other knit with a good stretch.


I did embellish the neck band with some buttons I found. I wish it was because of a creative idea, but I accidentally stitched the band on backwards and the seam was in the front. I decided the buttons would be perfect to cover up my little mistake and I was right. She also loved the addition and has no idea the reason behind it.


My daughter absolutely dislikes taking photos, especially if asked to model, but she loved these tops so much I could have taken her photo in them all day.


This month New Horizons Designs is running a sewing contest and the details are in their Facebook Group, but here is some of the information. Now is a good time to grab this pattern and sew up all the Dublins.


                   Please note that this post contains affiliate links. If you choose to make a purchase, I will get paid a small portion of that purchase.